%%%%%%%%%%%%%%%%%%%%%%%%%%%%%%%%%%%%%%%%%%%%%%%%%%%%%%%%%%%%%%%%%%%%%%%%
%%
%% GasTeX : Graphs and Automata Simplified in TeX
%%%%%%%%%%%%%%%%%%%%%%%%%%%%%%%%%%%%%%%%%%%%%%%%%%%%%%%%%%%%%%%%%%%%%%%% %% %% GasTeX : Graphs and Automata Simplified in TeX
\begin{figure}[H]
  \begin{center}
    \unitlength=4pt
    \begin{picture}(15, 28)(0,-10)
      \gasset{Nw=5,Nh=5,Nmr=2.5,curvedepth=3}
      \thinlines
      \node(A0)(7.5,0){$0$}
      \node[Nmarks=i,iangle=90](A1)(0,13){$1$}
      \node[Nmarks=if,iangle=90,fangle=90](A2)(15,13){$2$}
      \drawloop[loopangle=180](A1){$a$}
      \drawloop[loopangle=0](A2){$b$}
      \drawedge(A1,A2){$a$}
      \drawedge(A2,A1){$b$}
      \drawedge(A2,A0){$a$}
      \gasset{curvedepth=-3}
      \drawedge[ELside=r](A1,A0){$b$}
      \drawloop[loopangle=270](A0){$a, b$}
    \end{picture}
  \end{center}
  \caption{La complétion de l'automate.}
\end{figure}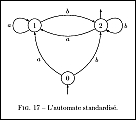
 | Code |
| binary relation | |
 | Code |
| binary tree (post order) | |
 | Code |
| undirected graph (a) | |
 | Code |
| undirected graph (b) | |
 | Code |
| undirected graph (c - linear) | |
 | Code |
| fsa (final 0 or even 1's) | |
 | Code |
| fsa (subword 00 or even 1's) | |
 | Code |
| fsa (ends in a - - , deterministic) | |
 | Code |
| cube (strings Hamilton dist 1) | |
 | Code |
| CMB Euler path | |
 | Code |
| CMB probes (A..G) and clones (1..6) | |
 | Code |
| CMB PQ trees | |
 | Code |
| Hilbert curve (tiles) |
This passage is produced by the following input:
The \emph{characteristic polynomial} $\chi(\lambda)$ of the
$3 \times 3$~matrix
\[ \left( \begin{array}{ccc}
a & b & c \\
d & e & f \\
g & h & i \end{array} \right)\]
is given by the formula
\[ \chi(\lambda) = \left| \begin{array}{ccc}
\lambda - a & -b & -c \\
-d & \lambda - e & -f \\
-g & -h & \lambda - i \end{array} \right|.\]
\left and \right to produce the large delimiters around the arrays. As we have already seen, if we usethen the size of the parentheses is chosen to match the subformula that they enclose. Next note the use of the alignment tab character\left)...\right)
& to separate the entries of the matrix and the use of \\ to separate the rows of the matrix, exactly as in the construction of multiline formulae described above. We begin the array with \begin{array} and end it with \end{array}. The only thing left to explain, therefore, is the mysterious {ccc} which occurs immediately after \begin{array}. Now each of the c's in {ccc} represents a column of the matrix and indicates that the entries of the column should be centred. If the c were replaced by l then the corresponding column would be typeset with all the entries left-justified, and r would produce a column with all entries right-justified. Thus\[ \begin{array}{lcr}
\mbox{First number} & x & 8 \\
\mbox{Second number} & y & 15 \\
\mbox{Sum} & x + y & 23 \\
\mbox{Difference} & x - y & -7 \\
\mbox{Product} & xy & 120 \end{array}\]
Note that both columns of this array are set flush left. Thus we use
{ll} immediately after \begin{array}. The large brace is produced using\left\{. However this requires a corresponding \right delimiter to match it. We therefore use the \emph{null delimiter} \right. discussed earlier. This delimiter is invisible. We can therefore obtain the above formula by typing\[ |x| = \left\{ \begin{array}{ll}
x & \mbox{if $x \geq 0$};\\
-x & \mbox{if $x < 0$}.\end{array} \right. \]
\begin{enumerate}

\item ...

\end{enumerate}
\usepackage{enumerate}

...

\begin{enumerate}[I]%for capital roman numbers.

\item

\end{enumerate}
\begin{enumerate}[(a)]%for small alpha-characters within brackets.
\item
\end{enumerate}\begin{itemize}
\item ...
\end{itemize}\renewcommand{\labelitemi}{$\bullet$}
\renewcommand{\labelitemii}{$\cdot$}
\renewcommand{\labelitemiii}{$\diamond$}
\renewcommand{\labelitemiv}{$\ast$}$\bullet$ ( ),
), $\cdot$ ( ),
),$\diamond$ ( ),
), $-$ ( ),
), $\ast$ ( ) and
) and $\circ$ ( ).
).\begin{description}
\item[] ...
\end{description}\begin{description}
\item[Biology] Study of life.
\item[Physics] Science of matter and its motion.
\item[Psychology] Scientific study of mental processes and behaviour.
\end{description}
\begin{itemize}\itemsep2pt

\item

\end{itemize}
> i run latex on the file.. it runs file; then i run makeindex on the
> file, it runs fine.  then i run latex on the file again, and it
> starts complaining.

makeidx.sty uses \write, (not \immediate\write) for index entries
which means that the output to the index file is delayed until the
whole page is output.  You thus have to do two things.

  . Move \printindex into a CJK environment

  . Insert \newpage after \printindex.

Below is my (slightly changed) version which works just fine.


    Werner


======================================================================


\documentclass[12pt]{article}

\usepackage{CJKutf8}
\usepackage{pinyin}
\usepackage[vietnam]{babel}
\usepackage{makeidx}


\makeindex


\begin{document}

\begin{CJK}{UTF8}{bsmi}

我是美國人\index{美國 mỹ quốc}

我不會說中文\index{cannot speak}

\printindex
\newpage

\end{CJK}

\end{document}

%%% Local Variables:
%%% coding: utf-8
%%% mode: latex
%%% TeX-master: t
%%% End:
\usepackage[你要下的參數]{geometry}
這方括孤中「你要下的參數」當然不是打入這些中文,而是下面我們要介紹的幾個常用設定。a4paper 指定使用A4紙張 margin=1in 把四邊邊界都設成 1英吋(當然可改數字,後不再說明) left=1in 把左邊邊界設成 1英吋 right=1in 把右邊邊界設成 1英吋 hmargine=1in 把左右邊界都設成 1英吋 top=1in 把上方邊界設成 1英吋 bottom=1in 把下方邊界設成 1英吋 vmargin=1in 把上下方邊界都設成 1英吋萬一,我們想要在左右留個裝訂的空間,該如何設呢?很容易,就是加入以下設定
bindingoffset=0.5in這樣一來,在奇數頁左邊,偶數頁的右邊,會多出0.5英吋的裝訂空間。
cwTeX[1] Type 1 字型(cwt1)
Version 1.1

Copyright (c) 1999-2004 Tsong-Min Wu, Tsong-Huey Wu.
Copyright (c) 2005-2007 Tsong-Min Wu, Tsong-Huey Wu and Edward G.J. Lee.

這套字型的使用許可證(License)是 GNU GPL 第二版或以後的版本(詳請見
COPYING 檔)。可自由重製、修改、散佈。如果沒有收到這個 COPYING 檔,
可至 http://www.gnu.org/licenses/gpl.txt 取得。或寫信至自由軟體基金會:

Free Software Foundation
51 Franklin Street, Fifth Floor, Boston, MA  02110-1301, USA

索取。

這些字型允許嵌入 ps/pdf(及其他相類的)檔案中而不因此影響文件或文件
格式本身所使用的授權(許可證)。

這些字型並不明示或暗示有任何的保證,請詳見 COPYING 檔。


摘要:
-----

這五套 Type1 字型是由 cwttf[2] 字型轉換而來。用於 LaTeX CJK 套件。

CJK 字型檔名  中文字體

[Big5/UTF8 環境皆使用相同的字型名,以下為標點符號置中]
cwmc       明體
cwkc       楷書
cwfsc      仿宋體
cwhbc      粗黑體
cwyc       圓體

[以下為標點符號置於底線]
cwmb       明體
cwkb       楷書
cwfsb      仿宋體
cwhbb      粗黑體
cwyb       圓體

命名原則:
---------

cw 代表 cwTeX。
m, k, fs, hb, y 代表明,楷,仿宋,粗黑,圓。
c, b 代表標點符號置中(center),置底線(baseline)。

1.1 變動:
---------

1. 不管 UTF8/Bg5 環境,皆使用相同的字型名。
2. 不再製斜體字,請使用其他相當的中文字型代替。
3. 標點符號由所使用的字型名來區分,字型名最後為 c(center) 代表置
   中,b(baseline) 代表置於底線。字型本體只使用一種,其他不管是
   不同編碼或不同標點符號系統皆使用用虛擬字型,以便節省字型空間。
   兩種標點符號系統可以同時存在於同一文件中。

下載處:
-------

site1: ftp://cle.linux.org.tw/tex/cjk/fonts/cwt1
site2: http://edt1023.sayya.org/fonts/tex/cwt1

安裝:
-----

tar zxvf cwX-1.1.tar.gz
cd cwX-1.1
./install.sh
移除:
./uninstall.sh

TeX Live 2007 的使用者,請修改 texmf.cnf,在 TEXMFDBS 最後加入
!!TEXMFHOME:

-TEXMFDBS = {[省略]!!$TEXMFMAIN,!!$TEXMFLOCAL,!!$TEXMFDIST}
+TEXMFDBS = {[省略]!!$TEXMFMAIN,!!$TEXMFLOCAL,!!$TEXMFDIST,!!$TEXMFHOME}


Have fun!


問題回報:
李果正 Edward G.J. Lee 〈edt1023_AT_cle.linux.org.tw〉
[1] http://ccms.ntu.edu.tw/~ntut019/cwtex/cwtex.html
[2] http://cle.linux.org.tw/fonts/cwttf/
可以先設定好目錄變數

SYSTEXMF=/usr/share/texmf
1. 移動 *.afm
![[GIF Image]](http://www.maths.tcd.ie/~dwilkins/LaTeXPrimer/EX_matrix.gif)
![[GIF Image]](http://www.maths.tcd.ie/~dwilkins/LaTeXPrimer/EX_arrtab.gif)
![[GIF Image]](http://www.maths.tcd.ie/~dwilkins/LaTeXPrimer/DM_cases.gif)
